Build a Deck That Stands the Test of Time
Deck failures rarely come from a single mistake; they result from overlooked details that shorten the lifespan long before the structure should fail. Soil movement, moisture intrusion, inadequate hardware, and poor material selection are the leading causes of premature deck replacement, even on otherwise well-built projects.
Every component, from footing depth to fastener coating, determines whether a deck lasts five years or thirty. With the right planning, materials, and hardware, anyone can build a deck that stands the test of time.
Start with a Strong Foundation
Every long-lasting deck begins in the ground, not on top of it. If the footing isn’t right, everything above will eventually move, sag, or fail. That’s why the first step is always excavation to the proper depth — below the frost line — to prevent seasonal heaving. After excavation, pour concrete piers sized to carry both the live loads of people and furniture and the dead loads of framing and decking. Skipping this step or cutting corners on footing size guarantees problems later, no matter how carefully the rest of the deck is built.
Once the concrete has cured, the next critical stage is connecting posts to those piers. This is where many failures begin, because untreated wood in direct contact with concrete absorbs moisture, leading to rot and structural compromise. Post bases solve this by creating separation between wood and concrete while anchoring the post firmly in place. The order here matters:
footing → pier → post base → post
Following that sequence ensures the load path is continuous, the posts resist lateral movement, and the base of the structure stays dry.
When the foundation is set this way, the rest of the deck has a chance to perform as intended. Skipping or reversing steps in this sequence usually means rebuilding years earlier than expected.
Choose Decking Materials for Long-Term Value
The framing may carry the load, but the decking boards determine how the structure weathers time, traffic, and the elements. Selecting the wrong material locks you into a cycle of premature replacement and endless maintenance. Selecting the right one gives you predictable performance and long-term value.
When choosing decking, think beyond the initial cost. Evaluate how each material behaves under moisture, UV exposure, and heavy use. Pressure-treated pine may win bids with its price point, but it demands frequent sealing and is prone to warping. Cedar and redwood offer natural resistance, though they remain softer woods that can wear under heavy traffic.
Composite and PVC alternatives require a higher upfront investment, yet they deliver decades of service with minimal upkeep.
Material | Image | Lifespan (Years) | Maintenance Needs | Cost Level | Pros | Cons |
Pressure-Treated Pine |  | 10-15 | Regular sealing/staining | $ | Affordable, widely available | Can warp, susceptible to rot |
Cedar/Redwood decking boards |  | 15-20 | Occasional sealing | $$ | Naturally rot-resistant, attractive | Higher cost, softer wood |
Composite decking boards |  | 25-30+ | Minimal cleaning | $$$ | Very durable, low maintenance | Higher upfront price |
PVC decking boards |  | 30+ | Minimal cleaning | $$$$ | Waterproof, insect-proof | Less “natural” appearance |
The right choice depends on project priorities: budget-sensitive jobs often default to pressure-treated, while high-end builds lean toward composites or PVC for longevity.
Hardware That Holds It All Together
Even the best lumber won’t perform if it’s connected with the wrong hardware. Fasteners and connectors determine how forces move through the structure, and they’re often the difference between a deck that feels solid underfoot and one that shifts with every step. Corrosion, improper load transfer, or undersized connectors are common failure points, but they’re also preventable with the right choices.
For longevity, hardware should always be exterior-rated and corrosion-resistant. Choose hot-dip galvanized or stainless steel depending on the environment. Coastal jobs, for example, demand higher-grade hardware to resist salt exposure. Beyond durability, the right connectors make assembly more efficient and ensure every joint contributes to the overall stability of the structure.
Here’s a checklist of essential hardware and why each piece matters:
Hardware Type | Image | Purpose | Why It Matters for Longevity |
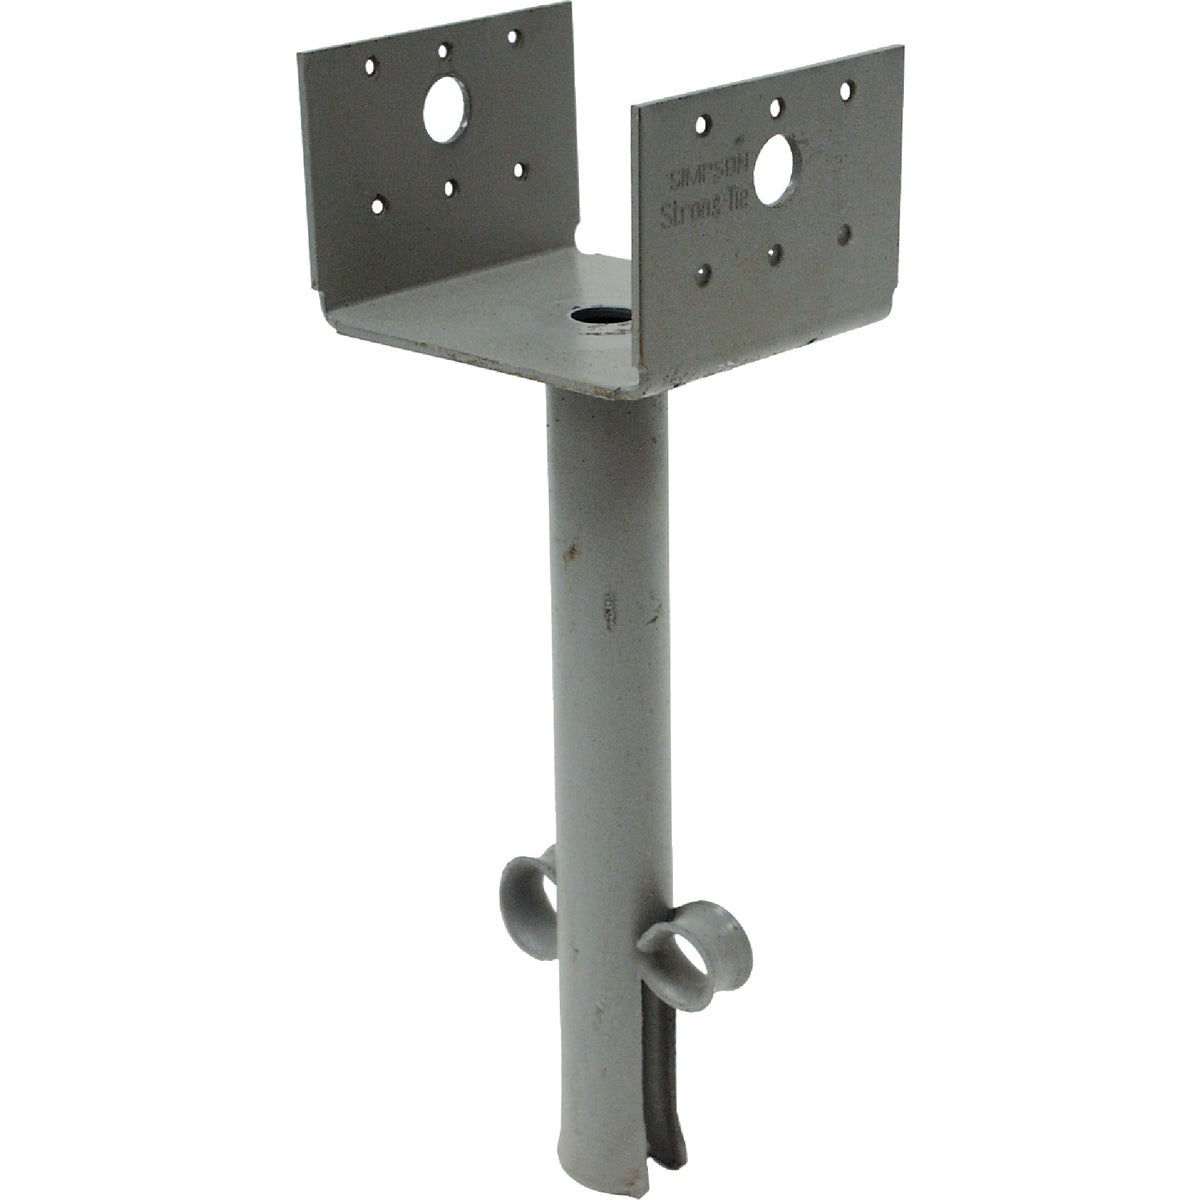 | Anchor posts to footings, lift wood off concrete | Prevents rot, resists lateral movement | |
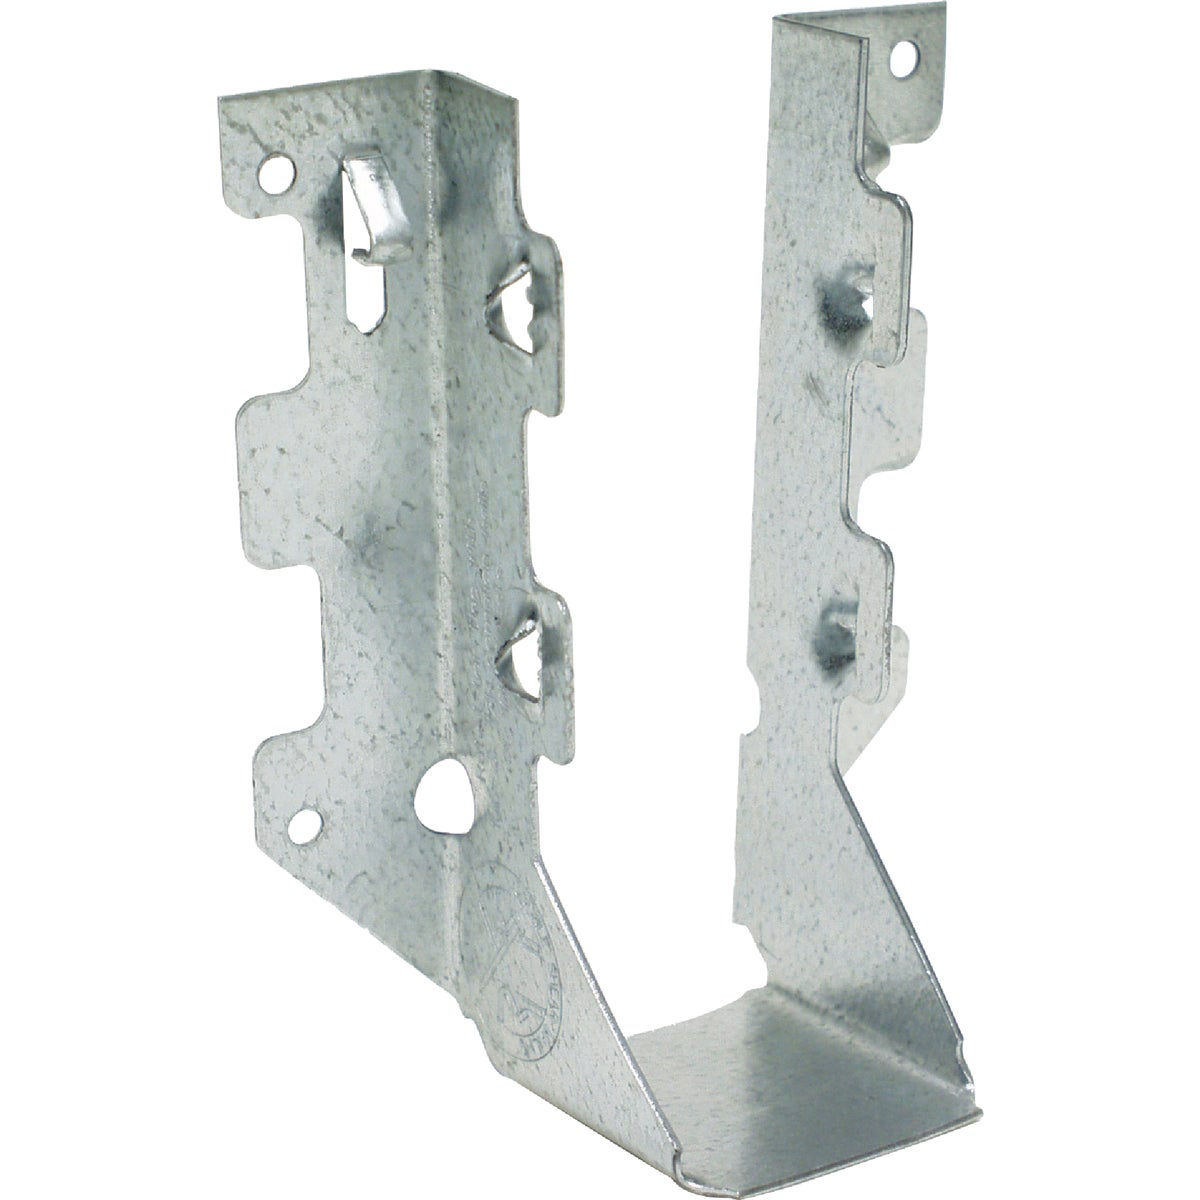 | Connect joists to beams securely | Prevents sagging and shifting | |
 | Fasten decking boards | Resist corrosion, hold boards tight | |
Ledger Board Fasteners | 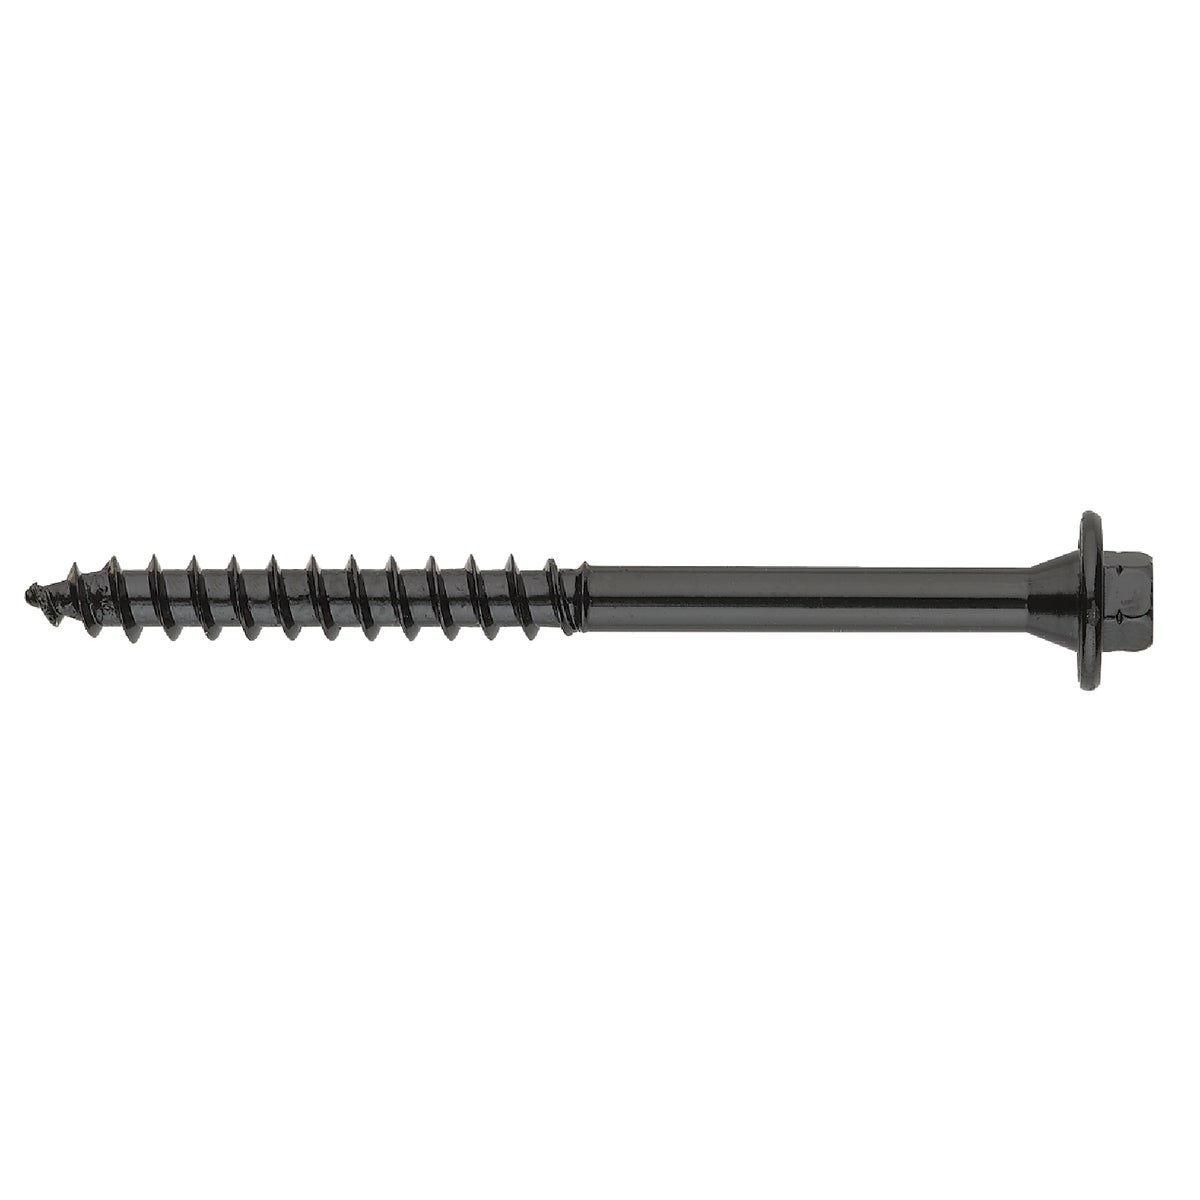 | Secure deck to house | Critical for safety & stability |
Angle Brackets/Straps | 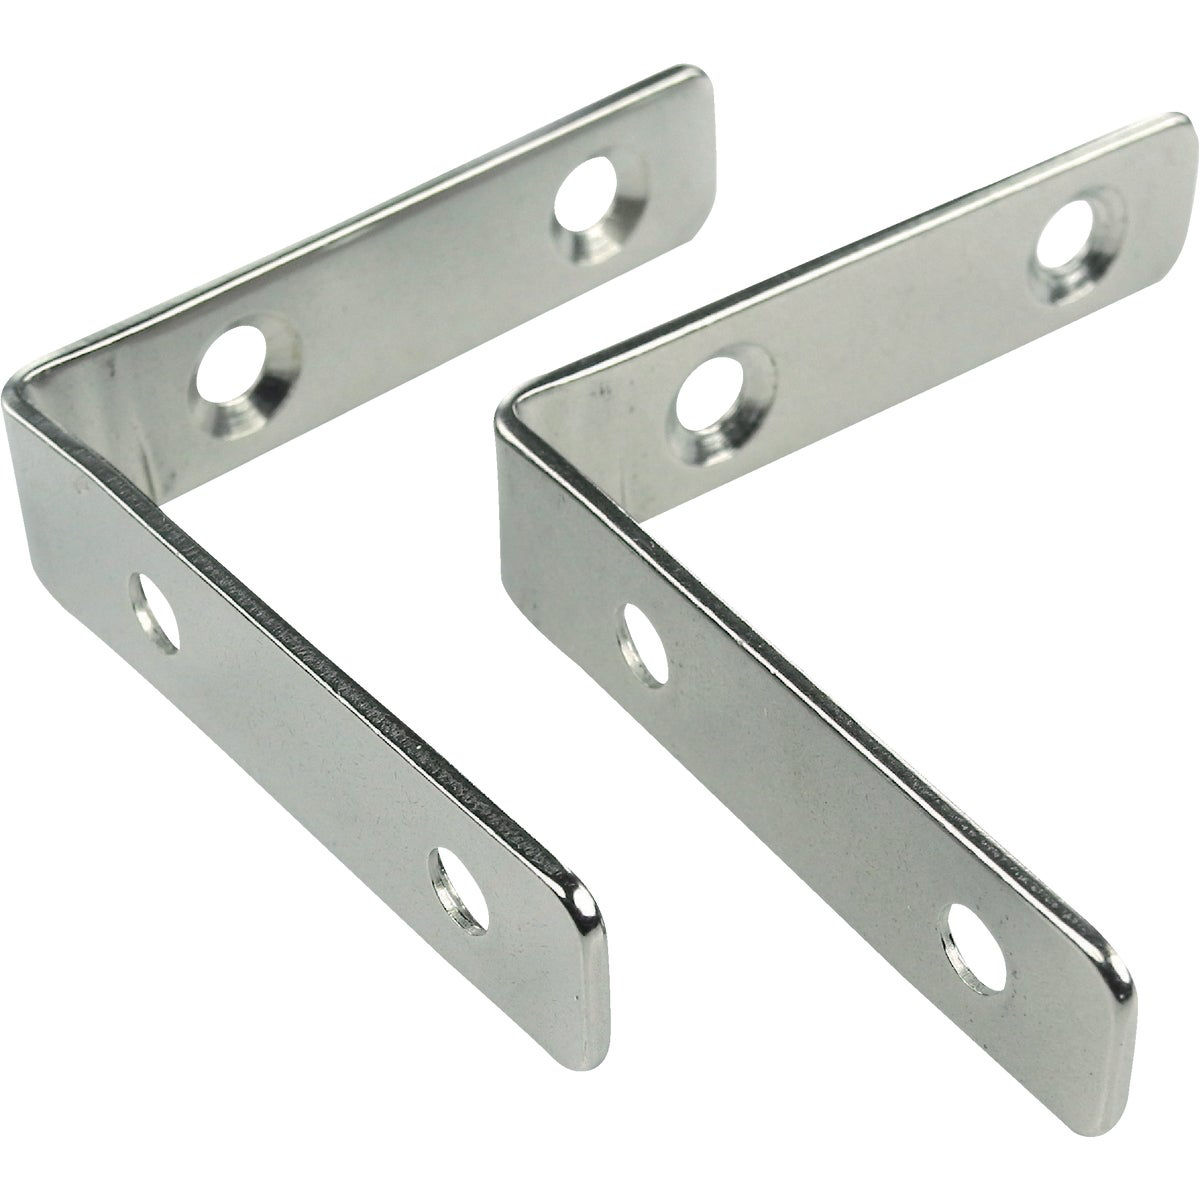 | Reinforce corners and bracing | Reduce racking under lateral loads |
Hardware may not be visible once the deck is finished, but it’s the skeleton that ensures the structure performs for decades. Skipping or downgrading these components isn’t saving money, it’s transferring costs into future repairs.
Build for Strength and Stability
A lasting deck must carry weight and resist movement over time. Strength comes from proper load paths, while stability depends on spacing and bracing. Many decks fail early because framing details were ignored.
Joists should match material requirements: 16 inches on center for most lumber, 12 inches for composites that flex more. Beams need to be sized for the span they carry, and diagonal bracing helps control sway. Each connection, from footing to post and joist to deck board, must complete a continuous load path into the soil.
Key checks:
Confirm joist spacing fits decking type
Add diagonal bracing on taller decks
Secure beams with hangers or bolts, not nails
Reinforce the ledger board with flashing and fasteners
Check alignment and level before fastening boards
These steps ensure the deck stays solid under weight and stable against shifting. Missing even one can shorten its life and compromise safety.
Protect Against Moisture

Water is the main reason decks fail before their time. Every point where wood meets water is a weak spot if not protected. Rot starts at the base of posts, on the tops of joists, and anywhere water sits without draining.
Moisture protection should be built into the design, not added later. Post bases lift wood above concrete, stopping direct absorption. Flashing tape seals joist tops to prevent water from seeping into fastener holes. A quality water-repellent deck stain shields decking boards from sun and rain. Even gravel under the deck can improve drainage and reduce standing water.
Simple methods like these extend service life and keep maintenance low. Skipping them means replacing boards and posts long before the rest of the structure wears out.
Don’t Forget Local Codes and Safety
A deck that looks strong on day one can still fail inspection or pose safety risks if it doesn’t meet code. Local regulations set standards for footing depth, railing height, stair design, and post anchoring. These rules exist because failure in any of these areas can lead to serious accidents.
Using code-approved hardware and proper fasteners is the easiest way to avoid problems. Post bases, for example, are often required to keep wood off concrete and to provide secure anchoring. Railings must resist specific lateral loads, and ledger boards need approved fasteners to hold the structure safely to the house.
Building to code ensures the deck is not only durable but also legally compliant and safe for long-term use.
Finishing Touches for Long-Term Care

A deck’s lifespan depends not just on how it is built, but also on how it is maintained. Small finishing steps at the end of construction make maintenance easier and protect the structure long term.
Seal exposed end cuts to keep moisture from entering the grain. Apply a water-repellent finish or stain to decking boards before they begin to weather. Check that all hardware is properly tightened and that flashing is in place to divert water away from critical joints.
Once the deck is complete, recommend a simple care routine: clean debris regularly, wash surfaces once or twice a year, and reapply protective finishes as needed. These steps reduce long-term costs and keep the deck looking and performing as it should for decades.
Related Articles
The Best Mailboxes of 2025: Modern, Decorative, Secure, and Residential Options
Discover mailbox ideas, tips, and buying guides to help you choose stylish, secure, and durable options that enhance your home’s curb appeal.
Learn more
Roofing Nails: A Comprehensive Guide to Nails for Roof and Shingle Installation
Explore expert guides on roofing nails – learn how to choose, install, and maintain the right nails for lasting, secure roof and shingle performance.
Learn more
Repairing and Sealing Concrete and Asphalt Driveways
Tips to help keep your driveway looking new for years to come
Learn more
How to Build a Fire Pit
A simple and affordable outdoor DIY project with a step-by-step guide
Learn more
6 Steps to Installing Laminate Flooring
Five easy DIY steps to upgrade your home to a beautiful space
Learn more